

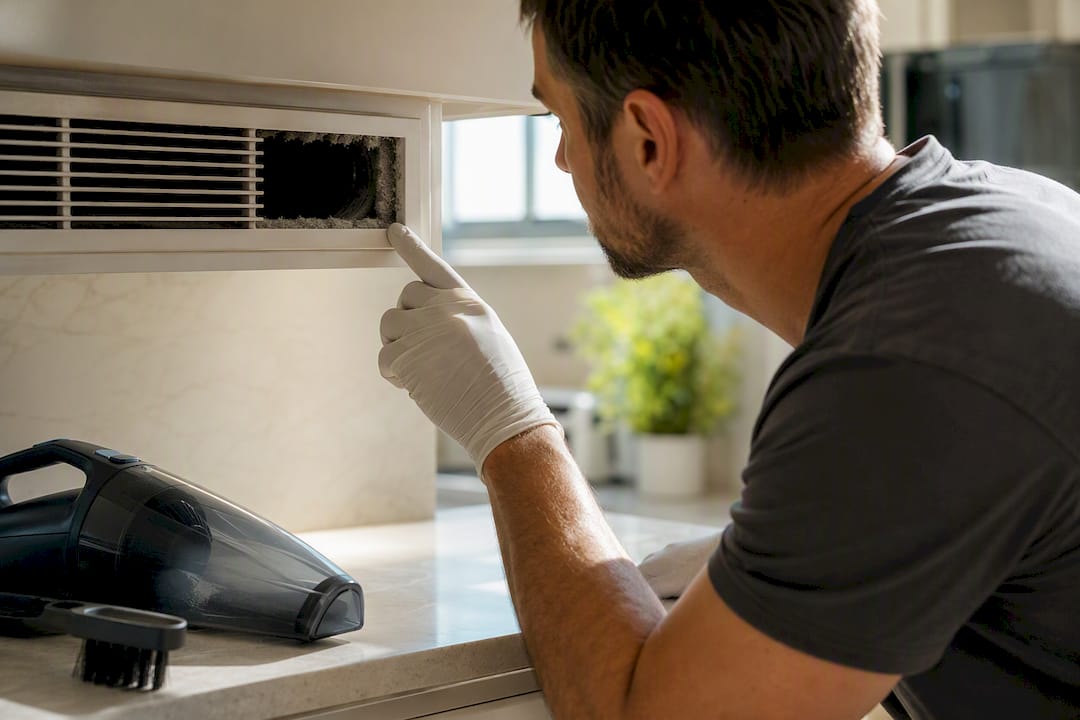
A brief puff of dust when your HVAC system kicks on is usually normal. Dust coming out of vents on a regular basis, though, points to a real problem: a bad filter fit, a leaky return duct, or dirty internal components. The likely culprits are filter failure, duct leaks, trapped debris, or a grimy blower wheel. Start by checking whether your filter is the right size and seated properly. That single check solves more dust complaints than anything else.
TL;DR:
- Ensuring your filter is the correct size, properly seated, and sealed tightly can eliminate most dust issues without further action.
- Leaking return ducts often draw in debris from attics or crawlspaces, contributing significantly to indoor dust levels.
- Persistent dust after filter and vent checks indicates leaks or contamination inside ducts that require professional inspection, sealing, and cleaning.
- Regularly replacing filters at a higher frequency, sealing duct leaks, and controlling indoor humidity reduce dust buildup long-term.
- DIY steps like inspecting filters and vent covers can resolve many cases, but constant dust or system odors often need professional camera inspection and targeted repairs.
Table of Contents
- What causes dust blowing from vents
- Step-by-step checks and DIY fixes you can try today
- How to stop dust from coming back for good
- When DIY isn’t enough: signs you need a professional
- The Clean Vents approach to fixing dust for good
- Why most dust advice stops one step too early
- Get a professional duct assessment in Laval
- Sources
- FAQ
What causes dust blowing from vents
Dust coming from vents almost always traces back to one of five mechanical failures, and each leaves its own telltale sign.
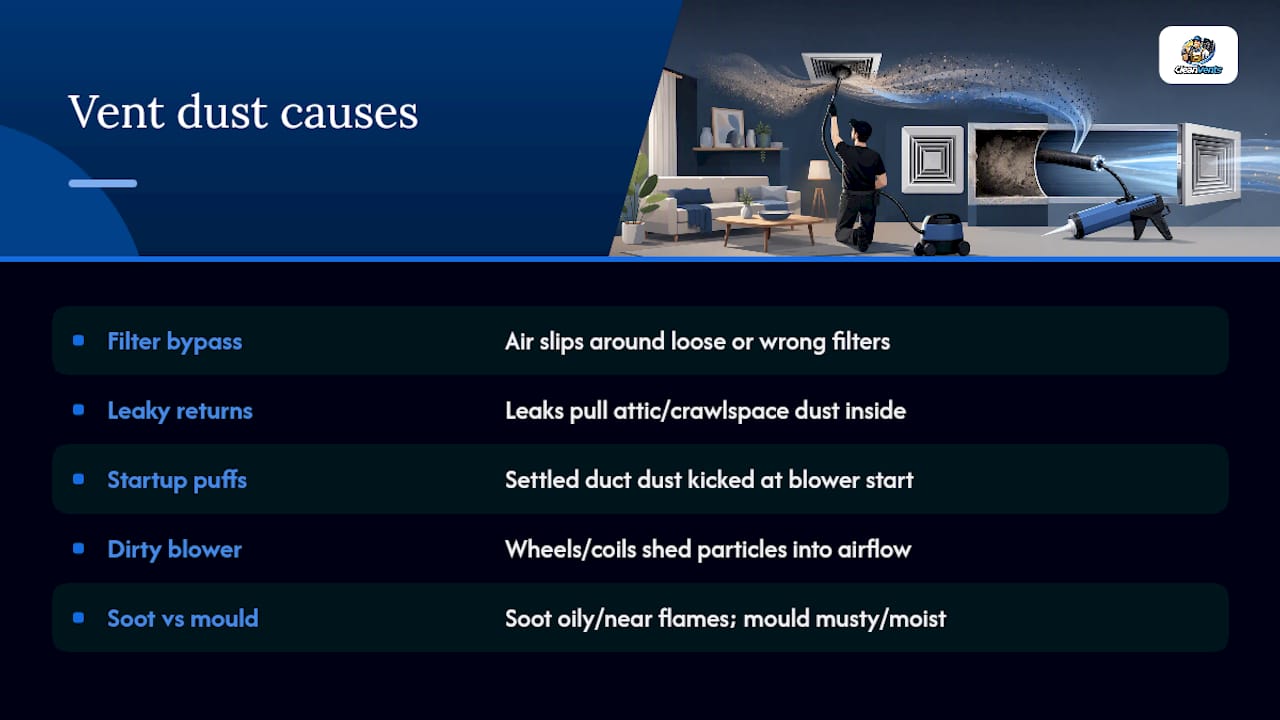
Filter problems top the list. A filter that’s the wrong MERV rating, bowed from airflow pressure, or simply too loose in its frame lets air slip around the edges instead of through the media. This is called filter bypass, and it’s sneaky: you can change your filter every month and still get dusty vents if the frame doesn’t seal tight. Check for daylight or a visible gap around the filter edges when you hold it up to a light.
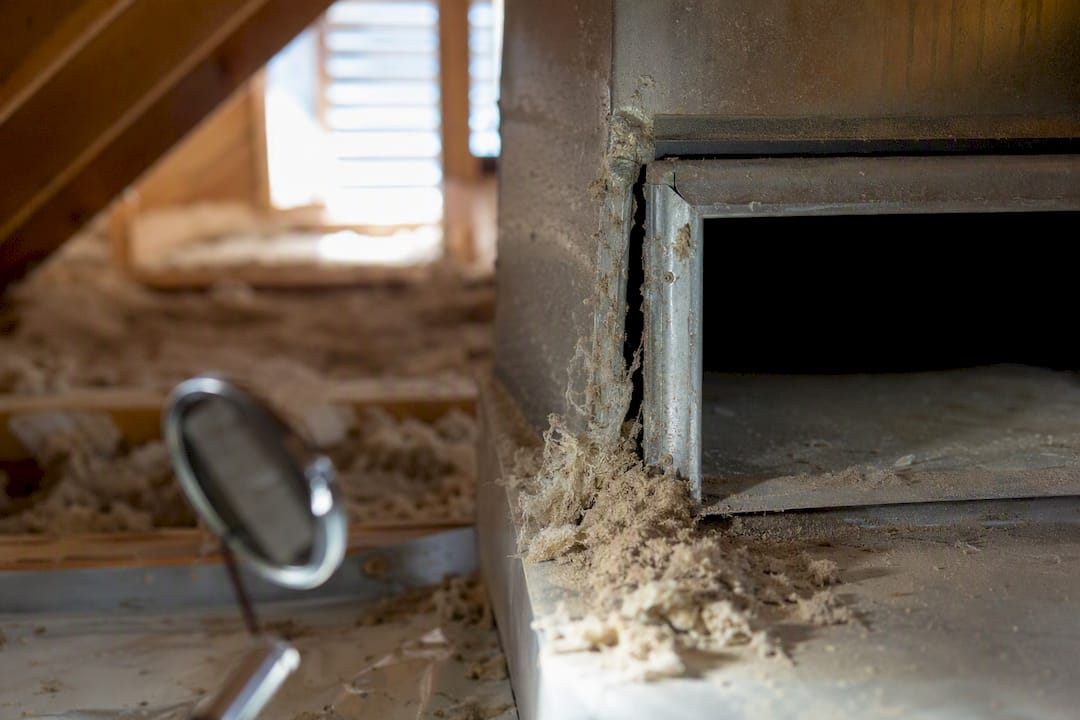
Leaky return ducts are the second big cause, and they’re often invisible. Return ducts run under negative pressure, pulling air toward the furnace. If a seam has separated in the attic or crawlspace, that suction pulls in insulation fibres, dust, and dirt from those spaces and distributes it through every supply vent in the house. According to research on HVAC air movement, a substantial portion of air in a typical duct system escapes through leaks like these, meaning a significant share of what you breathe indoors may have come from outside the living space entirely.
Startup puffs happen because dust settles in the ductwork between cycles and gets launched into the airstream the moment the blower spins up… A little of this is normal. Persistent puffing, especially after a renovation, usually means fine drywall or sanding dust has worked its way deep into the trunk lines.
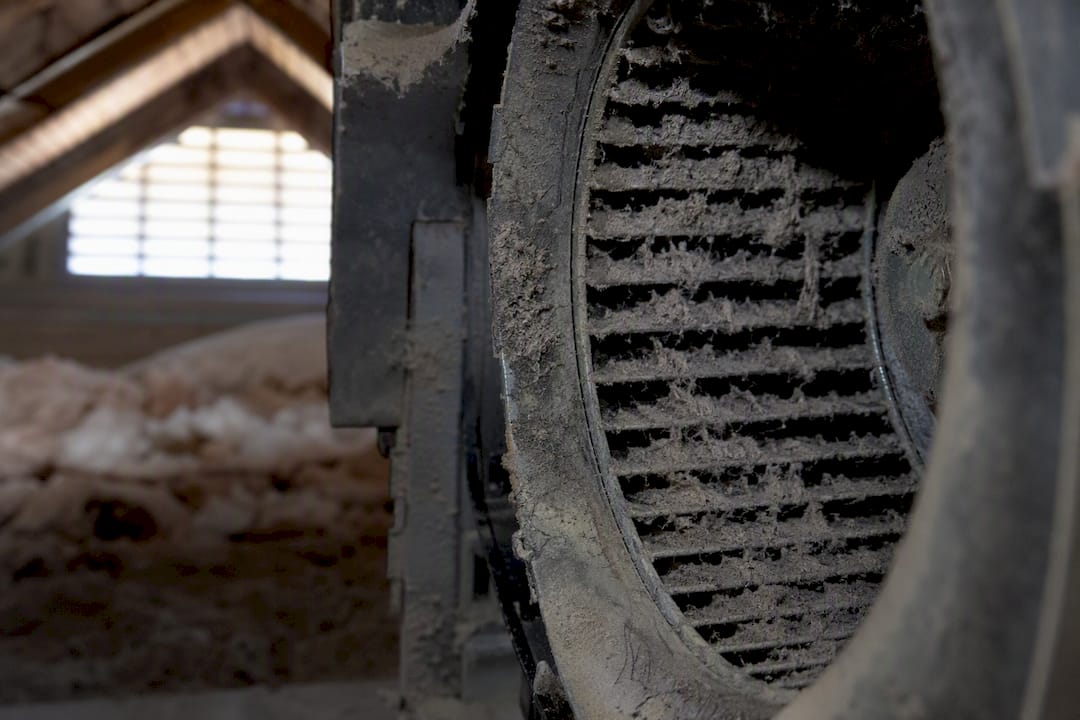
Dirty blower wheels and evaporator coils shed particles directly into the airstream they’re supposed to be moving cleanly. A blower wheel caked in dust doesn’t just look bad; it actively contaminates every cubic foot of air passing through.
Soot versus mould matters for diagnosis. Black or grey dust with an oily texture, especially near candles or a fireplace, usually points to soot. A musty odour paired with any moisture source (a condensate leak, high humidity, a damp crawlspace) points toward biological growth instead, which changes the fix entirely.
Step-by-step checks and DIY fixes you can try today
Before assuming you need professional help, work through this sequence. It follows the same troubleshooting order HVAC technicians recommend to homeowners, and it resolves the problem more often than people expect.
- Pull and inspect the filter. Hold it up to a light. If you can see through gaps around the frame, or the filter looks bowed rather than flat, that’s your filter bypass problem right there.
- Test the fit. A filter should sit snug with no wiggle room. If it’s loose, seal the frame edges with foam weatherstripping tape to close the gap.
- Remove vent covers and boots. Unscrew a few supply and return registers, vacuum inside the boot as far as your hose reaches, and wash the covers in warm soapy water before reinstalling.
- Check accessible returns while the fan runs. Hold your hand near duct seams in the basement or attic access points. Air movement where there shouldn’t be any signals a leak. Temporary fixes include foil HVAC tape or mastic sealant on accessible joints.
- Photograph anything you can’t reach. Use a flashlight to look into duct openings past the boot. Save the photos. A professional will want that context if you end up calling one.
Skip the temptation to open the blower compartment or air handler cabinet yourself unless you’re genuinely comfortable working around electrical components; you risk stirring up more dust than you clear, or worse, damaging something you’ll pay more to fix.
Pro Tip: A cheap phone flashlight and a few minutes of patience at each register will tell you more about where dust is entering than an hour of guessing. Photograph every gap, streak, or loose seam before you call anyone.
If dust keeps coming back after all of this, the quick checklist Clean Vents put together covers a few edge cases worth ruling out before booking a full inspection.
How to stop dust from coming back for good
Fixing today’s dust problem is only half the job. Keeping it from returning means treating your filter, your ductwork, and your indoor humidity as one connected system rather than three separate chores.
- Pick the right filter and stick to a schedule. Most homes do well with a MERV 8 to 11 filter; check your equipment’s rated limit before going higher, since some blowers choke on denser media. Homes with pets, kids, or recent renovation work should replace filters every 1 to 2 months rather than the standard 3.
- Seal the filter frame. Foam tape around the slot edges closes the bypass gap permanently instead of just for one filter change.
- Clean with the right tools. A HEPA-capable vacuum and damp dusting (not dry dusting, which just redistributes particles into the air) cut down what settles back into your ducts.
- Watch your humidity. Indoor humidity between roughly 30 and 50% keeps dust from clumping and resuspending as easily as it does in very dry air.
- Protect your ducts during renovations. Cover every register with plastic sheeting before drywall sanding or tile cutting, and switch the HVAC system off during the messiest phases. A low-dust containment approach during any renovation work limits how much fine debris gets pulled into your system in the first place.
Continuous fan operation is a mixed bag: it filters air more often, but only pays off if your ducts are properly sealed. In a leaky system, running the fan constantly can mean pulling in more unconditioned, dirty attic or crawlspace air, which works against you. For more on the housekeeping side of dust control, Clean Vents has a breakdown of common household dust sources worth a read.
When DIY isn’t enough: signs you need a professional
Some situations call for more than a flashlight and foam tape. Watch for these red flags:
- Dust returns within days of a thorough filter change and register cleaning.
- A musty or stale smell appears specifically when the system cycles on.
- Heavy dust deposits show up across multiple vents rather than just one.
- Dust persists for weeks after a renovation despite covering and cleaning registers.
- Anyone in the home develops respiratory irritation that eases when away from the house.
The EPA is clear that routine duct cleaning isn’t proven to prevent health problems on its own, and it doesn’t recommend cleaning as a blanket fix. Cleaning makes sense specifically when ducts show visible contamination or are actively releasing particles into the home, which is exactly the scenario these red flags describe. The EPA also cautions against chemical biocides or sealants applied without proper diagnostics first.
A comprehensive service should include a camera inspection to actually see what’s inside your ducts, blower and coil cleaning, duct sealing where leaks are found, and before-and-after photo documentation. Ask any provider for camera evidence, certification (INCV certification is the recognized standard in the industry), a written scope of work, and upfront flat-rate pricing before booking. Clean Vents’ guide to hiring a duct cleaning professional covers the questions worth asking any company you’re vetting.
The Clean Vents approach to fixing dust for good
Clean Vents technicians follow a specific sequence on every job: camera inspection first, then targeted source removal on the blower, coils, and return runs, followed by duct sealing and a filter recommendation matched to your equipment. Every technician carries INCV certification, and every job comes with upfront pricing and a satisfaction guarantee, so you know the scope before work starts.
Cleaning alone rarely holds. If a return duct is still leaking attic dust into your system, a clean duct fills back up within weeks. That’s why the combined approach, cleaning plus sealing plus the right filter, produces results that actually last rather than a temporary reset. Before hiring anyone, ask to see camera footage of your own ducts and request the before-and-after documentation that shows exactly what was removed and repaired.
Why most dust advice stops one step too early
Most guidance on dust blowing from vents ends at “change your filter,” and that’s the gap worth naming. A new filter in a warped frame still lets air bypass the media. A spotless register still pulls dirty attic air through a leaky return seam three feet away. The conventional advice isn’t wrong, it’s just incomplete, and incomplete fixes are why so many homeowners cycle through filters every month with no improvement.
The homeowner checks in this article, the filter fit test, the register vacuum, the flashlight inspection, genuinely resolve a meaningful share of cases, and they cost nothing but twenty minutes. That’s where to start, always. But treat persistent dust after those checks as diagnostic information, not a mystery. It’s telling you the problem lives somewhere you can’t reach with a vacuum: inside the duct runs, in the blower wheel, or in a return seam that’s been leaking since the day the ducts went in.
What we’d push back on is the instinct to just clean and hope. Cleaning without sealing the leak that’s feeding the dust is a temporary fix dressed up as a permanent one.
— Clean Vents
Get a professional duct assessment in Laval
If you’ve worked through the filter checks and the dust keeps coming back, Clean Vents is the direct next step, not another guessing game. We’re the local alternative to piecing together separate filter swaps, duct tape fixes, and hoping the next filter holds: our technicians run a camera inspection first, so you see exactly what’s contaminating your system before any work starts, and every job comes with upfront flat-rate pricing and a satisfaction guarantee.

That combined approach, cleaning the blower and coils, sealing the leaks feeding the dust, and recommending the right filter for your equipment, is what separates a lasting fix from a temporary one. If renovation dust, pet dander, or a musty smell on startup match what you’re dealing with, request a free quote through our air duct cleaning service page and get an INCV-certified technician out to inspect your system with a camera before you spend another dollar on filters that aren’t fixing the real problem.
FAQ
How do I stop dust from coming through my vents?
Start by checking that your filter fits tightly with no gaps, then vacuum accessible registers and boots, and inspect return duct seams for leaks while the fan runs. If dust keeps returning after those checks, a professional camera inspection can find leaks or contamination you can’t reach yourself.
What are the signs that my air ducts are dirty?
Look for visible dust deposits around supply and return registers, dark streaking on walls or ceilings near vents, a musty smell when the system cycles, or a filter that loads up with dust far faster than normal.
Why is black dust coming from air vents?
Black or grey dust with an oily texture is usually soot from candles, a fireplace, or deteriorating duct liner rather than mould. A musty odour paired with moisture, on the other hand, points more toward biological growth and needs a different fix.
Can dirty air ducts cause a dusty house?
Yes, particularly if the ducts have leaky seams pulling in dust from an attic or crawlspace, or if the blower wheel and coils are coated in debris that gets redistributed through every vent. The EPA notes that cleaning helps specifically when ducts are visibly contaminated or actively releasing particles into the home.