

Dust around vents almost always comes from one of four sources: a dirty filter, leaky or unbalanced ducts, a nearby dust source like dryer lint or soot, or leftover construction debris. Fix the filter, wipe the vent, and run a white cloth test, and most homes see the buildup drop within a day.
Do this now:
- Check or replace your furnace filter (a clogged one restricts airflow and pushes more dust past the vent face).
- Wipe the vent cover and hold a white cloth over it for 10 seconds. Grey film means routine dust; black streaks need a closer look.
- Vacuum the visible duct opening with a crevice tool before reinstalling the cover.
Duct debris alone can cut airflow by up to 30%, according to Clean Vents’ own field data, and the EPA notes that cleaning matters most when ducts are visibly contaminated. INCV certified technicians handle the cases that go beyond a filter swap. If the dust comes back within a week of cleaning, stop troubleshooting on your own and get an inspection.
Key Takeaways
Most dust around vents traces back to a neglected filter or an airflow imbalance in the ductwork, and both are fixable without guesswork once you know what to check.
| Point | Details |
|---|---|
| Start with the filter | Replace filters every 60 to 90 days, more often with pets, since a clogged filter drives dust out through registers. |
| Run the white cloth test | Wipe a vent, hold a white cloth over it for 10 seconds, and repeat monthly to track whether buildup is improving. |
| Know your dust types | Musty and clumped means mould, greasy means soot, fibrous means dryer lint, fine and even means ordinary dust. |
| Watch for airflow imbalance | Uneven dust across rooms often points to a damper or duct leak, not a dirty vent cover. |
| Call Clean Vents for persistent cases | INCV-certified technicians handle debris, leaks, and lint issues that DIY vacuuming and filter changes can’t fully resolve. |
Table of Contents
- What causes dust around vents?
- What’s a fast checklist to cut dust from vents right now?
- How do you clean vent covers and registers safely?
- How often should you inspect vents and filters?
- Is that black dust mould, soot, or lint?
- When should you hire a professional?
- Get a quote if your dust keeps coming back
- Sources
- FAQ
What causes dust around vents?
A dirty or overdue filter is the most common trigger. Once a filter clogs, air has to squeeze past it, and that pressure change pushes more fine particles out through the supply registers instead of trapping them. Filters more than 90 days old are the usual suspect, especially in homes with pets.
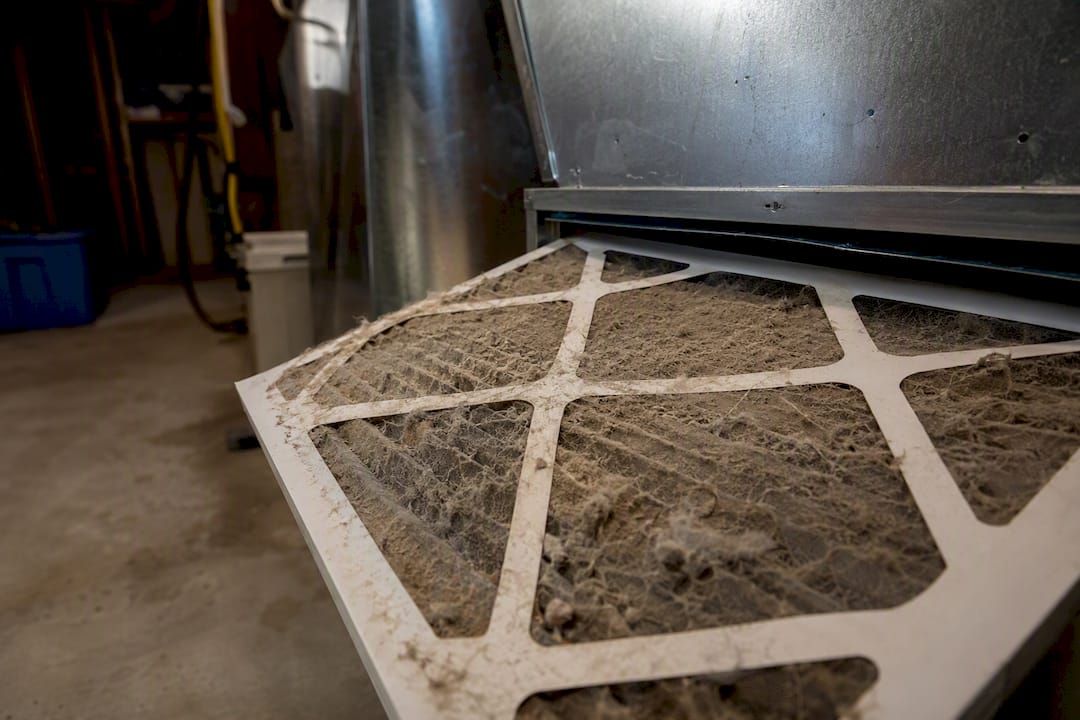
Duct problems come next. Leaky joints, poorly balanced runs, or long trunk lines create pockets where air moves slowly. Dust doesn’t get carried along in those low velocity zones. It just settles, then gets stirred up again every time the blower kicks on. This is why airflow balance issues, not just dirty vents, explain a lot of the buildup people blame on “old ducts.”
Sometimes the source isn’t the HVAC system at all. Common culprits include:
- Dryer lint drifting back through a nearby return if the dryer vent is clogged or improperly sealed.
- Soot from a fireplace or candles settling near registers in the same room.
- Renovation or construction dust that got pulled into the return before drywall work was finished.
- Ordinary pet dander and household dust concentrated by normal air circulation.
The pattern tells you a lot. Dust confined to one room usually points to a local source (a fireplace, a nearby closet reno). Whole house dust points to the filter or the main trunk line. A musty smell suggests moisture or mould; a smoky smell suggests soot rather than dust.
What’s a fast checklist to cut dust from vents right now?
- Turn off the HVAC fan at the thermostat so you’re not vacuuming while air is moving.
- Check the filter. If it’s grey, clogged, or past 90 days, replace it.
- Wipe the vent face with a damp microfiber cloth.
- Vacuum the visible duct opening using a crevice attachment, working in short passes rather than one deep push.
- Run the white cloth test again after cleaning to confirm the improvement.
Pro Tip: Let vent covers air dry completely, ideally overnight, before screwing them back on. Trapped moisture behind a warm register is exactly the environment mould needs to take hold.
Stop here and don’t attempt further DIY cleaning if you see clumped black growth, a heavy sooty film after a chimney fire, or any exposed wiring near the register. Those situations call for a professional, not a stronger vacuum.
How do you clean vent covers and registers safely?
Cleaning the visible parts of your system is straightforward if you follow the order below rather than jumping straight to soap and water.
- Shut off the HVAC system at the thermostat or breaker.
- Remove the vent cover with a screwdriver, supporting it so it doesn’t fall.
- Vacuum loose dust off both sides using a soft brush attachment.
- Soak metal covers in warm water with a few drops of dish soap; add a splash of white vinegar for stubborn grime. Scrub gently with a soft bristled brush.
- Rinse and dry completely with a microfiber cloth, then use a hair dryer on low heat to clear any moisture from seams or hinges.
- Vacuum inside the duct opening (the “boot”) with a crevice tool before the cover goes back on. Wiping the boot itself is what actually stops dust from recirculating.
- Reinstall once everything is bone dry.
You’ll need a screwdriver, a soft bristled brush, dish soap, white vinegar, microfiber cloths, a vacuum with crevice and brush attachments, and an extension pole for ceiling vents out of reach.
A few things to avoid:
- Don’t soak wooden, painted, or ornate vent covers. Water lifts finish and warps wood.
- Don’t run the blower fan while you’re cleaning. It just redistributes what you’re trying to remove.
- Skip abrasive pads and harsh solvents. They scratch finishes and can strip protective coatings on metal covers.
How often should you inspect vents and filters?
Filters need attention more often than most homeowners think, and the schedule the Spruce recommends lines up with what technicians see in the field: wipe vent covers every few months, and book a full HVAC inspection every one to three years. Homes with pets or allergy sufferers should check filters monthly and replace them roughly every 60 to 90 days rather than waiting for the standard 90 day mark.
Between professional visits, a few simple checks catch most problems early:
- The white cloth test, repeated monthly, tracks whether dust is trending up or down.
- A visual check behind the register, using a flashlight, spots lint, debris, or early mould growth.
- A sniff test for musty odours can flag moisture before it becomes visible.
- Holding your hand or a strip of tissue near the vent tells you whether airflow feels weak, which often means a damper or duct issue rather than a dirty vent.
Pro Tip: If one room collects dust noticeably faster than the rest of the house, check the damper on that branch line before assuming the vent itself is the problem. Uneven dust across rooms is one of the clearest signs of an airflow balance issue rather than a cleaning issue.
Is that black dust mould, soot, or lint?
Not all dark residue means the same thing, and treating them the same way can make matters worse.
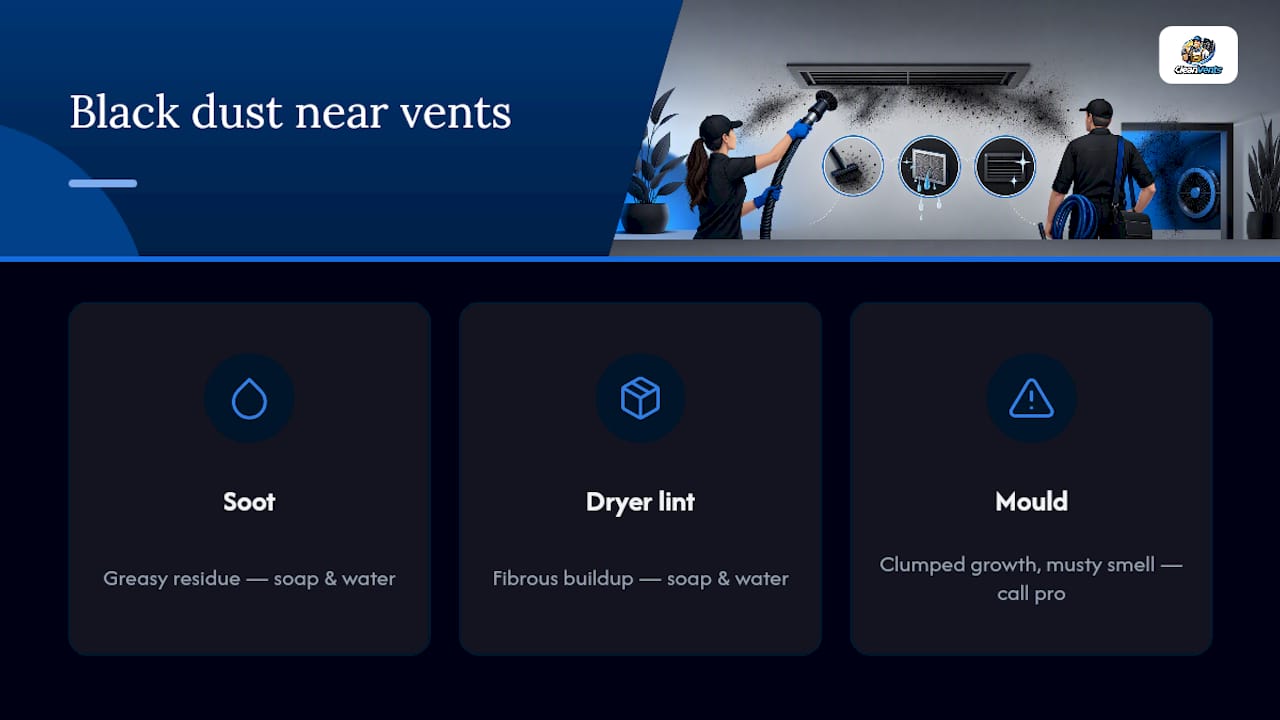
- Mould looks clumped or fuzzy, smells musty, and comes back within days even after cleaning. Stop cleaning and get it tested if you see this, especially if anyone in the home has respiratory symptoms.
- Soot looks greasy or smudgy and shows up near vents in rooms with fireplaces or heavy candle use. It wipes off but leaves a faint residue.
- Dryer lint looks fibrous and pale grey, usually near vents close to the laundry room, and points to a dryer vent that isn’t sealed properly.
- Normal dust is fine, uniform in colour, and spread evenly across the whole house rather than concentrated in one spot.
Duct debris that reduces airflow can also make any of these problems worse over time, since trapped debris blocks up to 30% of normal airflow and gives dust, lint, and mould spores more surface area to collect on. If you’re seeing fibrous buildup specifically near a laundry area, a dryer vent cleaning is worth booking before the lint becomes a fire risk.
When should you hire a professional?
DIY cleaning solves most everyday dust problems. Call a professional when any of these show up:
- Dust returns within a week of a thorough cleaning and a fresh filter.
- You see visible mould growth or smell a persistent musty odour.
- The home recently went through a renovation and registers are still coughing out fine dust.
- Return registers are heavily clogged despite regular filter changes.
- You suspect duct leaks, gaps at the joints, or signs of pest activity inside the ducts.
A reputable contractor will typically:
- Inspect the full system, not just the visible registers.
- Use truck mounted vacuum equipment or specialized brush systems, which pull embedded debris that a household vacuum can’t reach, particularly after construction work.
- Seal duct leaks with approved mastic or tape rather than household duct tape.
- Follow recognized standards for any mould remediation work.
The EPA is clear that routine duct cleaning isn’t a blanket health fix. It’s warranted for visible contamination, not as a seasonal ritual. Ask any contractor for their certification (INCV is the recognized standard in Quebec), what’s included in the scope of work, how they capture debris, and whether they can show before and after photos from similar jobs.
Why professional cleaning matters for persistent problems
Once dust keeps coming back despite a clean filter and a wiped vent, the issue usually sits deeper in the duct system than a vacuum with a crevice tool can reach. That’s where INCV-certified technicians make the difference: proper equipment removes debris that’s been compacted against duct walls for years, not just what’s sitting near the opening.
Clean Vents technicians work under transparent, flat-rate pricing and back every job with a satisfaction guarantee across Laval, Rosemère, Boisbriand, Blainville, Lorraine, Bois-des-Filion, and Sainte-Thérèse. Benefits homeowners typically notice:
- Improved airflow and fewer hot or cold spots room to room.
- Fewer airborne allergens circulating after a full clean.
- Lower energy use, since inspecting and sealing ductwork can meaningfully cut the extra load a clogged system puts on a furnace or heat pump.
What we see most often on service calls
Most calls Clean Vents gets aren’t mysterious. It’s a filter that’s been forgotten for six months, a dryer vent that’s never been cleaned, or dust that started right after a renovation and never really settled down. The pattern repeats often enough that we can usually guess the cause before we open the first register.
One habit we tell every homeowner to build in: after any vent cleaning, run the fan on its own for 10 to 15 minutes with a fresh filter in place. It flushes loose particles out of the system instead of leaving them to resettle on the next heating cycle.
Get a quote if your dust keeps coming back
If you’ve worked through the filter change, the wipe down, and the white cloth test and dust is still gathering around your vents within days, the problem is likely sitting further into the duct system than any at-home fix reaches. Clean Vents runs on flat-rate, upfront pricing, so you know the cost before a technician ever shows up, which beats calling around for quotes after the job is half done.

Every technician is INCV certified, and every job in Laval and the surrounding towns comes with a satisfaction guarantee. Whether the issue is duct debris cutting into your airflow, a dryer vent packed with lint, or a wall-mounted AC unit blowing dusty air, the air duct cleaning service covers the full system rather than just the visible registers. Book a free online quote or call directly, and if the technician doesn’t find contamination worth cleaning, they’ll tell you that too.
Sources
- Should You Have the Air Ducts in Your Home Cleaned? | US EPA
- How to Clean Air Vent Covers and Finally Get Rid of That Hidden Dust
- How to Clean Air Vents, Registers, and Improve Indoor Air Quality – The Clean Tips
- Why Dust Accumulation Around Vents Is a Sign of Poor Airflow Balance – ttHVACpro
FAQ
How do I stop dust from coming through my vents?
Replace the filter, wipe down the vent cover, and vacuum the visible duct opening with a crevice tool. If dust returns within a week, the cause is likely deeper in the duct system and worth a professional inspection.
How do I get rid of black dust around air vents?
Identify the type first: greasy residue is soot, fibrous buildup near laundry areas is dryer lint, and clumped growth with a musty smell is likely mould. Clean soot and lint with soap and water, but stop and call a professional if you suspect mould.
Are dusty vents a fire hazard?
Dust itself around supply vents isn’t typically a fire risk, but lint buildup in a dryer vent line is a well documented one, which is why a clogged dryer vent needs prompt attention rather than routine dusting.
What could be causing dust on my ceiling around my air vents?
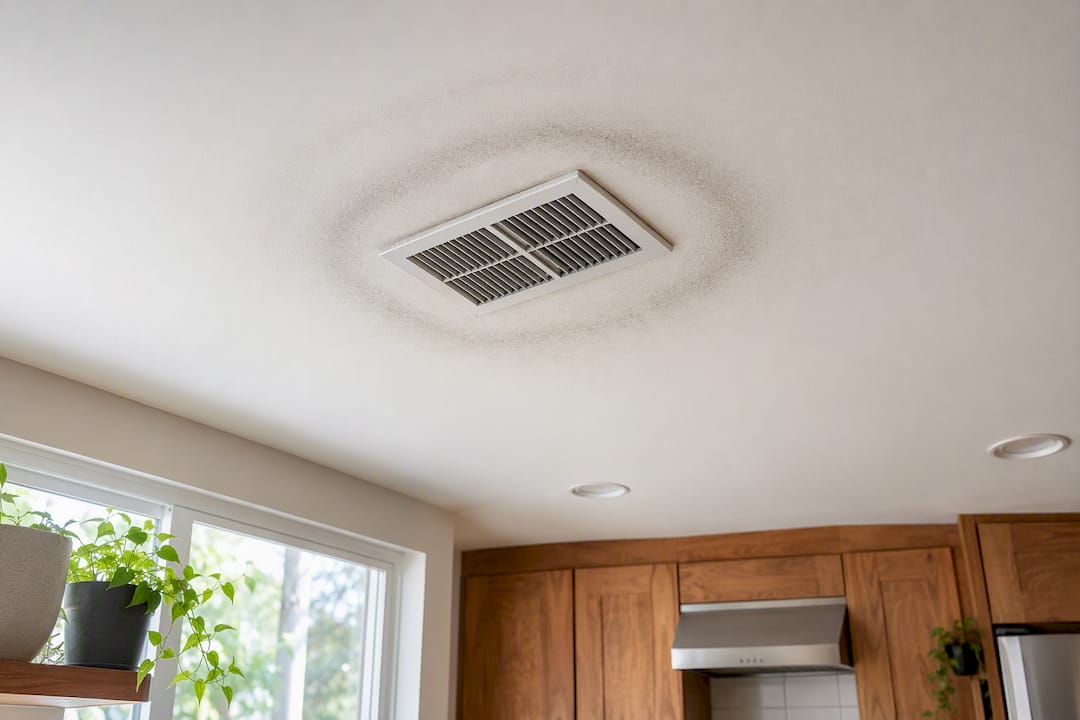
Dark rings on the ceiling near vents usually point to air leaking around the register boot and depositing dust as it escapes, often tied to poor duct sealing or an airflow imbalance in that branch line. Sealing the boot and checking nearby ductwork typically resolves it.
Is it normal to see some dust around vents even after cleaning?
A light film reappearing after several weeks is normal household dust settling again. Dust returning heavily within days points to a filter, duct, or airflow issue that a cleaning alone won’t fix.