

If you suspect a bird nest in your dryer vent, stop using the dryer immediately. A blocked vent traps heat and lint against a live nest, which is a real fire hazard, and for gas dryers it can also push carbon monoxide back into the house instead of outside where it belongs. There’s also the bird to think about. If eggs or chicks are inside, disturbing them can be both cruel and, depending on your location, against wildlife protection rules.
Your next two moves are simple: unplug the dryer (shut off the gas supply too, if you have one), then walk outside and look at the exterior vent hood from a safe distance.
A dryer running against a blocked vent doesn’t just dry clothes slowly. It builds up heat with nowhere to go, and that’s the exact condition that starts a duct fire.
- Unplug or power down the dryer right away.
- Turn off the gas line if you have a gas dryer.
- Inspect the outside vent hood from a distance before touching anything.
- Call a wildlife rehabilitator or a dryer-vent technician if you see feathers, nesting material, or hear movement.
Key Takeaways
A bird nest in a dryer vent is a fire and carbon monoxide risk that demands stopping the dryer first, confirming nest activity second, and calling the right professional third.
| Point | Details |
|---|---|
| Stop the dryer immediately | Unplug it and shut off the gas supply on gas models until the vent is confirmed clear. |
| Check activity before touching anything | Eggs or chicks mean you call a wildlife rehabilitator, not a DIY removal. |
| Match the pro to the problem | Wildlife removal handles live birds; vent cleaners handle debris, sanitization, and damage. |
| Install metal, not plastic, guards | Metal wire-mesh or magnetic flush-mount covers resist chewing and weather far longer. |
| Book annual cleaning to prevent recurrence | Clean Vents offers INCV-trained technicians, flat-rate pricing, and a satisfaction guarantee across Laval and nearby areas. |
Table of Contents
- How to tell if a bird nest is in the dryer vent
- What to do immediately if you suspect a nest
- Legal and humane rules around active nests
- Who to call: wildlife removal, vent cleaner, or HVAC tech
- What professional removal and cleaning actually involves
- How to stop birds from nesting in your vent again
- Removing an inactive nest yourself: a safety checklist
- Why hire a certified dryer-vent cleaner
- What a first-hand encounter with a vent nest looks like
- How Clean Vents handles bird nests and vent blockages
- Sources
- FAQ
How to tell if a bird nest is in the dryer vent
Most homeowners catch this one of three ways: they see it, they smell it, or they hear it. The exterior vent hood is the first place to check. Look for twigs or grass poking out from under the flap, streaks of droppings on the siding below the vent, or an adult bird flying in and out on a regular pattern, usually a sign of an active nest rather than an old, abandoned one.
Indoors, the clues show up in your laundry room. Clothes that used to dry quickly now take noticeably longer. A musty, almost barnyard smell drifting from the dryer or the vent line is another giveaway, and so is lint or debris blowing back into the room instead of exiting outside. Homeowners often don’t catch the problem until drying performance has already dropped noticeably, which is usually a sign the blockage has been building for a while.
Then there’s sound. Chirping, scratching, or fluttering coming from inside the wall or the duct run itself is about as clear a signal as you’ll get.
- Twigs, straw, or droppings around the exterior vent hood
- Birds repeatedly flying to and from the same spot on the house
- Drying times noticeably longer than usual
- Musty or animal-like odour near the dryer
- Chirping or scratching sounds inside the vent line or wall
Pro Tip: Use your phone’s flashlight and camera to look into the exterior vent opening from a step or so back. Snap a few photos rather than reaching in. It’s the safest way to check for nesting material or eggs without touching anything.
What to do immediately if you suspect a nest
Once you’ve spotted the signs, move through these steps in order rather than jumping straight to removal.
- Stop the dryer. Unplug it, and if it’s a gas model, shut off the gas supply as an extra precaution against carbon monoxide buildup.
- Inspect from the outside only. Look at the exterior hood and the flap mechanism. Don’t climb into an attic or start pulling ductwork apart if you’re not sure what you’re looking at.
- Check for activity before touching anything. If you see eggs, hear chicks, or watch an adult bird coming and going, leave the nest alone and call a wildlife rehabilitator or a permitted removal service.
- If it looks small and inactive, you have two reasonable paths: a careful DIY removal (covered later in this guide) or a call to a professional who will clean and inspect the whole vent line while they’re at it.
Removing ductwork you’ve never handled before, while there’s an active nest inside, is how homeowners end up with a bigger repair bill and an injured bird. When in doubt, stop and call someone who does this for a living.
Legal and humane rules around active nests
Migratory bird protections in many jurisdictions make it illegal to disturb an active nest containing eggs or dependent chicks, and even where the law is less specific, it’s simply the humane call. The basic principle holds everywhere: if birds are actively using the nest, leave it exactly where it is until the young have fledged, and get a licensed wildlife rehabilitator involved instead of handling it yourself.
Rules vary by province and even by species, since some birds carry more protection than others. If you’re not sure what’s nesting in your vent, your local wildlife rehab centre or municipal animal control office can usually tell you over the phone based on a description or a photo.
In the meantime, you still need dry laundry. Set up an indoor drying rack or a temporary clothesline, or use a laundromat, until the nest becomes inactive or a professional clears it safely.
- Active nest with eggs or chicks: leave it alone, call a rehabilitator
- Unsure what species or nest stage you’re dealing with: call before touching anything
- Need laundry done in the meantime: dry rack, clothesline, or laundromat
Pro Tip: Mark your calendar for a follow-up check in two to three weeks. Most songbird nesting cycles wrap up within that window, and that’s your signal to book professional removal and cleaning.
Who to call: wildlife removal, vent cleaner, or HVAC tech
These three professionals solve different problems, and picking the wrong one wastes a service call.
Wildlife removal specialists handle live birds, active nests, and situations where eggs or chicks are present. They’re trained to relocate animals humanely and, in many cases, know the legal restrictions around specific species better than a general contractor would.
Dryer-vent cleaning services step in once the nest is inactive, or right after wildlife removal has cleared any live birds. Their job is to strip out nesting debris, lint buildup, and feathers from the entire duct run, then sanitize and inspect for damage. This is also the group that installs bird guards and other prevention hardware.
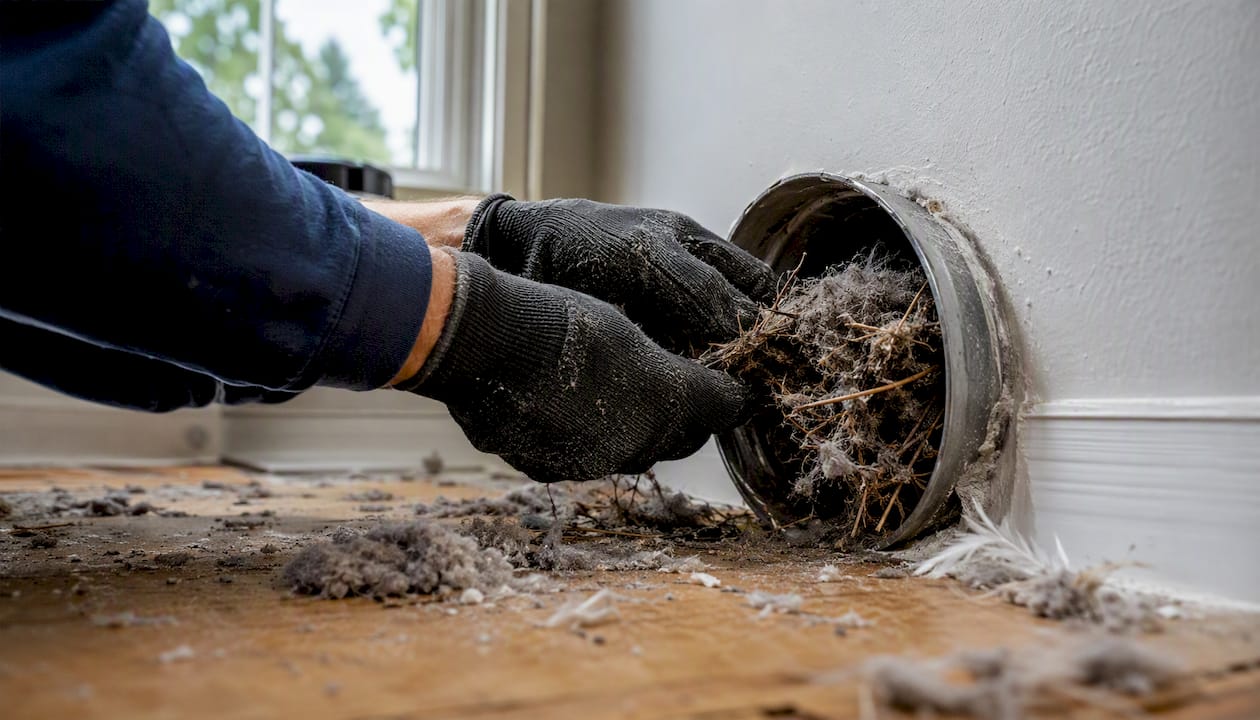
HVAC or duct technicians get called for structural problems: a crushed or disconnected duct section, a vent that needs rerouting through a wall, or damage severe enough that sections of ductwork need replacing rather than just cleaning.
Call a pro immediately if any of these apply:
- The nest is active (you’ve seen or heard birds, eggs, or chicks)
- The nest is large or packed deep into the duct, not just sitting near the exterior opening
- You’ve found lint buildup or visible duct damage during your exterior inspection
- You have a gas dryer and suspect any blockage at all
When you book, have this information ready: whether the nest looks active or inactive, your dryer type (gas or electric), roughly how long the vent run is, and whether the vent is easily accessible or buried behind finished walls. According to Bob Vila’s reporting on the issue, homeowners dealing with birds in dryer vents are usually best served by pairing wildlife removal for live animals with a full vent cleaning and inspection afterward, since the two problems (the animal and the debris it leaves behind) rarely resolve with just one service call.
What professional removal and cleaning actually involves
A properly done job isn’t just pulling out a nest and calling it finished. Here’s the sequence a competent technician follows:
- Initial inspection, often with a camera scope, to confirm the nest location and check for structural damage along the duct run.
- Removal of nesting material and debris, working from both the exterior hood and, if needed, an interior access point.
- Full lint and debris extraction from the entire vent line, not just the section near the nest, since compacted lint often extends well past the blockage itself.
- Sanitization, since bird droppings and nesting material can carry mites, mould spores, and pathogens that a simple vacuum pass won’t eliminate.
- Damage inspection and minor repairs, checking for crushed sections, gaps in the ducting, or a damper that no longer closes properly.
- Installation of a bird guard or vent cover, if the homeowner doesn’t already have one, to prevent a repeat visit next nesting season.
Pricing depends heavily on access. A single-storey home with a short, straight vent run costs less to clear than a multi-storey house with a long, bent duct route or one buried behind finished basement ceilings. Collapsed or crushed duct sections, and anything requiring sanitization beyond a standard cleaning, also push the price up.
Before booking, ask for proof of insurance, confirmation of industry certification such as INCV training, a satisfaction guarantee, and before-and-after photos of the vent line. A company that hesitates to document its own work is one worth skipping.
How to stop birds from nesting in your vent again
Prevention hardware is where most homeowners get this wrong the first time, usually by buying the cheapest plastic louver at the hardware store. Thin plastic cracks in cold weather and gets pecked or chewed through within a season or two. Metal is worth the extra few dollars.
Three hardware options actually work:
- Metal wire-mesh guards that bolt over the exterior vent opening, letting lint and air out while keeping birds from squeezing in. Stainless steel versions hold up far better against weather and chewing than plastic equivalents.
- Flush-mount covers with a magnetic flap, sometimes called VentGuard-style covers, which include a removable internal bird guard designed to stay code-compliant while blocking wildlife entry. The magnetic closure design keeps the flap sealed against backdrafts when the dryer isn’t running.
- Removable hood-style guards, which fit standard 3 inch and 4 inch vent openings and can be popped off for cleaning without unscrewing the whole assembly.
When installing any of these, measure your vent diameter first. Most residential dryers use either 3 or 4 inch ducting, and a poorly fitted guard leaves gaps birds will find. Check that any damper or magnetic flap moves freely and seals shut when the dryer’s off, since a stuck-open flap defeats the entire point of the guard.
Pair the hardware with a yearly maintenance habit: a quick exterior check each spring before nesting season starts, and an annual professional cleaning to catch lint buildup before it becomes a fire risk on its own.
Pro Tip: If you’ve had bushes or a birdfeeder near the vent side of your house, consider relocating them. Birds tend to nest close to a reliable food source, and moving the feeder even a few metres away reduces the odds they’ll pick your vent as a nesting spot next spring.
Removing an inactive nest yourself: a safety checklist
If you’ve confirmed there’s no activity, no eggs, and no chicks, and the nest looks small enough to reach without disassembling major ductwork, a careful DIY removal is reasonable. Gear up first: work gloves, a dust mask, safety goggles, a flashlight, and either a shop vacuum or one with a HEPA filter.
- Unplug the dryer and disconnect the exterior vent hood or cover.
- Detach the interior flexible or rigid ducting from the back of the dryer, following the manufacturer’s release mechanism.
- Remove nesting material by hand or with kitchen tongs, working from both ends of the duct toward the middle.
- Vacuum thoroughly along the entire duct run, not just the section where the nest was.
- Wipe down the interior with a mild disinfectant to deal with droppings residue and reduce odour.
- Reattach the ducting and exterior cover, then run the dryer briefly on a no-heat or air-fluff setting to confirm strong airflow at the exterior vent.
Tools and materials to have on hand:
- Work gloves and a dust mask
- Flashlight and phone camera
- Kitchen tongs for reaching into the duct
- Shop vacuum or HEPA vacuum
- Disinfectant wipes or spray
Stop immediately if the nest turns out to be larger than expected, packed deep into a bend you can’t reach, or if you spot eggs or chicks partway through. That’s your cue to call a certified dryer-vent cleaning service rather than pushing further into a duct system you can’t fully see.
Why hire a certified dryer-vent cleaner
A reputable service does more than pull out a nest. It cleans the full vent line end to end, inspects for physical damage like crushed or separated joints, sanitizes surfaces exposed to droppings, and documents the whole job with before-and-after photos so you know exactly what was done.
Look for a few specific trust markers before booking anyone:
- Technicians trained to a recognized industry standard, such as INCV certification
- Proof of liability insurance
- A written satisfaction guarantee
- Photo documentation of the vent before and after cleaning
- Clear, upfront flat-rate pricing rather than a vague estimate
Before the technician arrives, make it easy for them: clear access to both the dryer and the exterior vent, snap a few photos of what you’ve already observed, and have your dryer’s make and model on hand. That small bit of prep often shortens the visit and helps the technician spot patterns, like whether lint has already started extruding around the vent flap, which is often the earliest sign of a building blockage.
What a first-hand encounter with a vent nest looks like
A homeowner once described hearing faint chirping through the laundry room wall for two days before connecting it to the dryer at all. She’d chalked up the slower drying times to an old machine. It was only when she noticed grass sticking out from the exterior vent hood that the pieces came together, and she shut the dryer off that same afternoon.
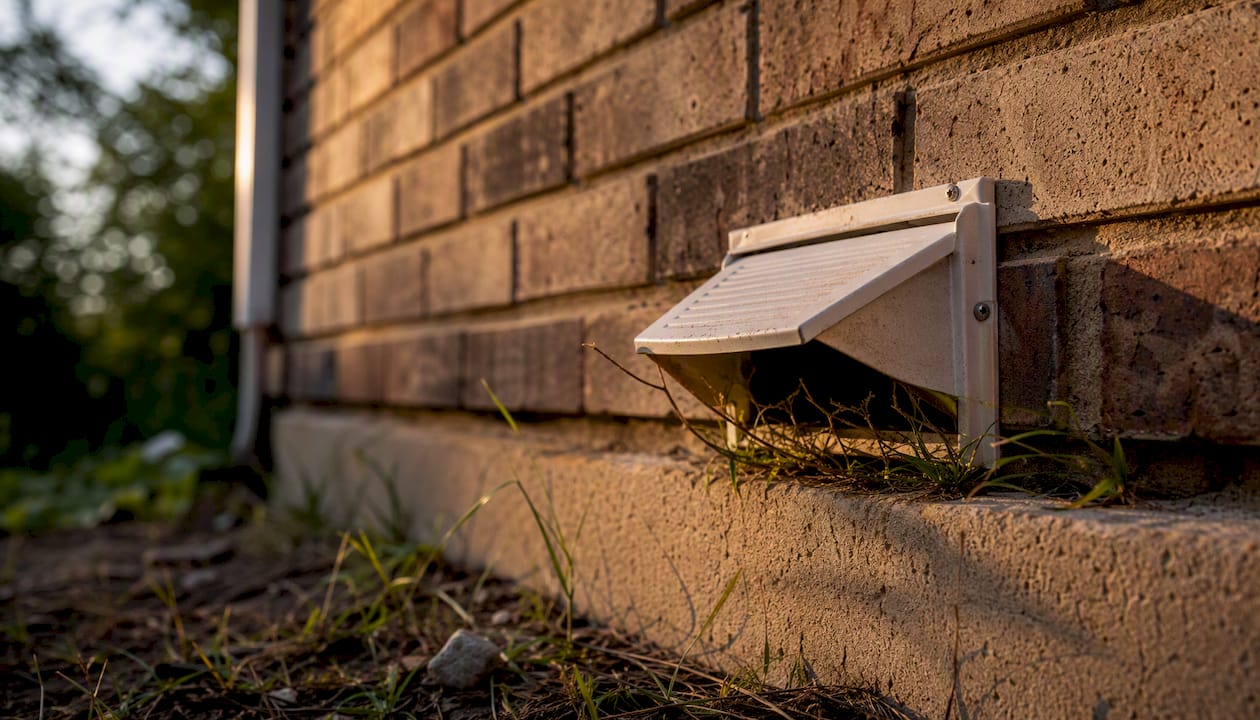
That’s the pattern technicians see again and again: the signs build quietly for a week or two before someone puts it together. One thing worth watching for early is lint extrusion around the vent flap edges, since a flap that can’t fully close because of debris behind it is often the first visible clue that something’s blocking the line, well before you’d ever hear a bird.
How Clean Vents handles bird nests and vent blockages
Clean Vents is the straightforward alternative to guessing whether a plastic vent cover or a half-finished DIY job actually solved the problem. Our technicians are trained to INCV standards and handle the full job: nesting debris removal, complete lint extraction along the duct run, sanitization, and a damage inspection, all at one upfront flat rate with no surprise add-ons once the truck arrives.
We serve Laval and the surrounding communities, including Rosemère, Boisbriand, Blainville, Lorraine, Bois-des-Filion, and Sainte-Thérèse, and every job comes backed by insurance coverage and a satisfaction guarantee. If you’re dealing with an active nest, get the birds cleared by a wildlife rehabilitator first. Once the nest is inactive, book a dryer vent cleaning appointment with us and have your dryer type, vent length, and access details ready when you call. We’ll take it from there, including recommending and installing a metal bird guard so this doesn’t happen again next spring. Request your free quote through our main booking page whenever you’re ready.
Sources
- Birds in Your Dryer Vent? Here’s How to Remove Them Safely and Humanely
- HY-GUARD EXCLUSION® Flush Mount VentGuard™ is an aesthetically-pleasing, worry-free dryer vent cover that stops birds, mice, squirrels, and other wildlife from nesting in your dryer vent.
FAQ
How do I get a bird’s nest out of a dryer vent?
If the nest is inactive, unplug the dryer, detach the exterior vent cover, and remove debris by hand or with tongs before vacuuming and sanitizing the duct. If it’s active with eggs or chicks, leave it alone and call a wildlife rehabilitator or a professional vent cleaning service instead.
How do I keep birds from nesting in a dryer vent?
Install a metal bird guard, either a wire-mesh cover or a flush-mount cover with a magnetic flap, and schedule annual professional vent cleaning to catch buildup before nesting season starts.
Is dryer lint safe for bird nests?
Dryer lint isn’t a safe nesting material for birds because it can trap moisture, harbour mould, and pose a choking or entanglement risk to chicks. It’s also part of what makes a vent blockage a fire hazard once a nest is added on top of it.
How do I get an animal out of a dryer vent?
Stop using the dryer, inspect the exterior vent from a distance, and if you see or hear the animal moving, call a wildlife removal specialist rather than trying to extract it yourself. Once the animal is out, a professional vent cleaning service should clear remaining debris and sanitize the duct before you run the dryer again.